Lisa
General thoughts and specific hacks from the domains of science, cognition and programming
Every once in a while, when I’m in the right frame of mind, I fall down a rabbit hole and I just enjoy the ride. At some point an hour or two later I’ll look up and see what I’ve done and realize I’ve just invested a ton of time into a project that’s completely over-dimensioned, kind of useless and could have been done in about 20 minutes by hand, and probably gotten a better result. But then I’m already 2 hours into it. I can’t just abandon it and leave it half-baked and useless. At least if it’s finished, it’ll just be useless.
So last week, preparing for the new semester, I was doing a good old digital decluttering and realized that it bothered me that in MacOS finder there’s no was to tell at a glance whether a folder is version controlled by github or ownCloud or gitLab or whatever else there is. I would like that information, especially since different projects use different systems.
A couple of specific folders that Apple thought were important, though, have different little folder icons with a symbol embossed on them: Downloads and Documents and Music and so on.
![]()
After a little research I found out that Apple saves all it’s icons, including the generic folder icon, under
/System/Library/CoreServices/CoreTypes.bundle/Contents/Resources/
They only have a very couple of folder icons, pretty much just those you see in the home folder. But, you can change the icon of any folder, that’s the take away. Simply right click on the folder, so to get info and drag the icns file onto the little icon in the top left corner.
Other people have already done a good job of making very pretty folder symbols that you can just download and use (like this one). The ones I found though just didn’t have the symbols I wanted. They focussed on which kind of data was contained in the folders. But I just wanted indicator of whether the folders are purely local and if not, where they live.
You can see where this is going. No problem, I thought, I’ll just make my own.
These little folder Icons though, aren’t just pngs, as one might think. They’re icns files, basically zipped folders which contain pngs in a variety of sizes. Well, I’ll be dammed if I manually save a few pngs in different sizes as this youtube video suggests. I can probably whip up a quick script that can turn a png into an .icns file. And once I’m at it, the script might as well also overlay the symbol onto the folder icon…
The fact that I’m only ever going to need maximum of 3-5 icons, only came to me a lot later (leaving me in a fairly dismal place on the cost-benefit curve). I also just dove straight in without researching and later found this project that does literally the same thing, but better.
I decided to go with openCV to superimpose the icon png onto the folder png. This is probably the only actually interesting part, because I wrestled with it for a significant amount of time. OpenCV has built-in functions for blending like cv2.addWeighted(src1, alpha, src2, beta, gamma). I couldn’t get this to work for 2 reasons. The first is that addWeighted requires that you give both pictures a transparency value that has to add up to one. You’re not sicking one image on to of the other, you’re blending them (which is not what we want, the folder icon needs to be opaque). The other reason is that it’s not made to deal with an image that has 4 channels like a transparent png.
What I wanted to do is stick a semi-transparent layer on top of the folder icon and the only way I could find to do that was to manually decompose the image into it’s component channels, calculate the appropriate value for each and then recombine them. This should actually be easier than it sounds, because the symbol icon isn’t in color. Each of the four channels has the same information, just shape. That means that i can just find the appropriate pixels in each channel and punch a different value into them (aiming to get the same color as the apple folders).
import cv2 as cv
#load files
rgb_folder=cv.imread(folder_icon_path, cv.IMREAD_UNCHANGED)
rgb_icon=cv.imread(theme_icon_path, cv.IMREAD_UNCHANGED)

# Get individual layers
(iB, iG, iR, iA) = cv.split(overlay)
(fB, fG, fR, fA) = cv.split(rgb_folder)

# only using opacity layer to get shape because icons should be simple enough only the shape matters
iA = (iA/255)

# the numbers tacked onto the back here make the icon a similar shade as the system ones
#red
nR = fR
nR[iA==1] = fR[iA==1]*0.757
# green
nG = fG
nG[iA==1] = fG[iA==1]*0.888
# blue
nB = fB
nB[iA==1] = fG[iA==1]*0.928

# merge layers into single image var (making sure the type is the same everywhere)
output = cv.merge([nB.astype(float), nG.astype(float), nR.astype(float), fA.astype(float)])
Well, this is what I got. The color is not all that similar to the default Apple folders.

This part is really just a matter of resizing and saving the png of the result and then zipping it into an icns file.
def makeIcns(icon_name, icon):
    '''
    Takes icon and generates .icns file with all the required resolutions inside
    '''
    #icns file
    icns_dir_path = cwd + "/icns/"
    icns_path = icns_dir_path + "/" + icon_name + ".iconset"

    # try to make that folder
    if os.path.exists(icns_dir_path + "/" + icon_name + ".icns"):
        raise Exception("That name is taken")
    else:
        os.makedirs(icns_path)

    os.chdir(icns_path)

    # required files for icns folder
    icons = [('icon_512x512@2x.png', (1024, 1024)),
            ('icon_512x512.png',  (512, 512)),
            ('icon_256x256@2x.png', (512, 512)),
            ('icon_256x256.png',  (256, 256)),
            ('icon_128x128@2x.png', (256, 256)),
            ('icon_128x128.png',  (128, 128)),
            ('icon_32x32@2x.png',  (64, 64)),
            ('icon_32x32.png',   (32, 32)),
            ('icon_16x16@2x.png',  (32, 32)),
            ('icon_16x16.png', (16, 16))]

    # generate required files
    for i in icons:
        im = imresize(icon, i[1], interp='bilinear', mode=None)
        cv.imwrite( '{}/{}'.format(icns_path, i[0]), im)

    # make into icns file
    os.chdir(icns_dir_path)
    os.system("iconutil -c icns "+ icon_name + ".iconset")
    shutil.rmtree( icon_name + ".iconset" )
Now all of this might have been pretty neat. But somehow, quite apart from the fact that the color is still off, somehow my icns file does not get displayed as nicely as the default ones. It looks like the resolution is worse or something, but I havent figured it out.
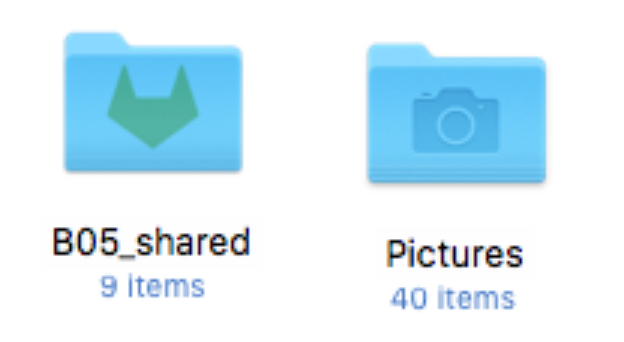
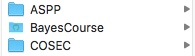
In the second view you can barely tell anything is in the folder icon at all and it mostly differs from the other icons by not having enough contrast or a lower resolution or something. If anyone knows why that is, let me know, I’m stumped!
So, while I had fun programming this, I’m thoroughly underwhelmed by the result. What went wrong?